

Pumpkin carving is a fun and creative tradition during the fall season, especially around Halloween. But few people know how to carve a pumpkin and even fewer can turn an overgrown orange squash into a work of art.
In this article, we take you through the basics of pumpkin carving so that even beginners can get started with confidence. We also share some professional tips for creating perfectly carved pumpkin-works-of-art every time and for every family member – no more lopsided jack-o’-lanterns!
Plus, if you’re tired of the same old triangle-shaped eyes and jagged-tooth mouth designs, we’ve got plenty of fresh ideas and inspiration for the unique pumpkin creator within. Get ready to impress your friends and neighbors, becoming the talk of the neighborhood, with your newfound carving skills!
Basics of Pumpkin Carving
Explore essential tools for pumpkin carving, how to select the right pumpkin and a step-by-step guide to basic carving techniques in this comprehensive tutorial.
Picking a Pumpkin & The Right Tools for the Job
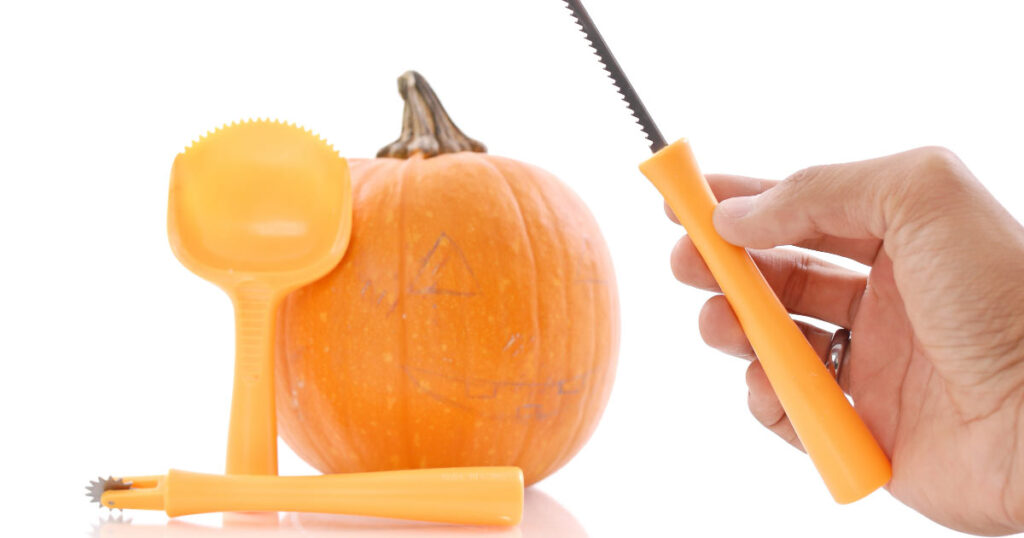
Pumpkin carving is a fun activity that many people enjoy, especially around Halloween. If you want to carve your own pumpkin, there are some essential tools you need.
To start, you’ll need a good quality pumpkin carving kit. This usually includes small saws which are safer and more effective than kitchen knives for cutting through the tough skin of the pumpkins. They also allow for more detailed designs.
Next up is a scooper or scraper tool. You use this to clean out all the seeds and stringy parts inside of your pumpkin before starting to carve it.
Marker pens can be useful too! You can draw your design onto the surface of the pumpkin first so that you have something to follow when making cuts with your saw.
Lastly but importantly, don’t forget about lighting! Small LED lights or tea candles work well in illuminating your carved masterpiece from within!
Remember to always take care while using these tools because even though they’re made for kids as well as adults – they’re still sharp enough to cause injuries if not used properly.
Selecting the Right Pumpkin for Carving
Choosing the right pumpkin for carving can make your Halloween even more fun! The first thing you need to do is decide what size of a pumpkin you want. If it’s too small, there might not be enough room to carve out your design. But if it’s too big, it may be hard to manage.
When selecting a pumpkin, look for one that has smooth skin and no bruises or cuts. This will help when you’re ready to start carving because rough spots can mess up your design. Also check that the stem is strong and firmly attached – this shows that the pumpkin is healthy.
The color of the pumpkins matters as well; pick ones with uniform orange shade all over its body without any green patches. It should also feel heavy for its size which means it’s full of flesh inside – perfect for carving!
Try to choose a flat-bottomed pumpkin so it won’t roll away while you’re trying to work on your masterpiece! With these tips in mind, finding just-the-right-pumpkin will be easy-peasy!
Professional Tips for Perfectly Carved Pumpkins
Now that you have the right tools in hand for your pumpkin carving event, learn a step-by-step process to perfect your craft and get expert tips on maintaining freshness post-carving.
Step-by-Step Process to Achieve Perfectly Carved Pumpkins
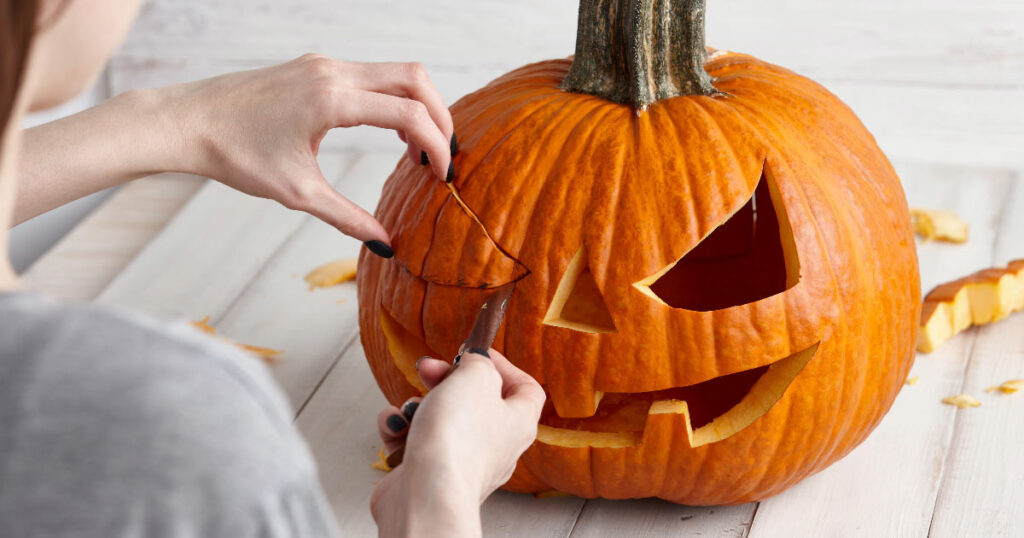
Carving pumpkins can be a fun and creative activity, especially during Halloween season. Here’s an easy step-by-step guide to help you carve the perfect pumpkin.
Begin by choosing your pumpkin carefully. It should have smooth skin and feel solid when tapped lightly on the side. Next, draw or stencil your design onto the surface of the pumpkin using a marker pen.
Now comes the messy part! Cut off the top of your pumpkin with a sharp knife – this becomes its ‘lid’. Scoop out all seeds and pulp from inside until it’s clean enough to hold a candle safely.
Once that’s done, use small carving tools (or even just kitchen knives) to cut along lines of your drawn design. Always remember safety first: don’t rush this process!
Afterwards, wipe down any leftover marker marks with wet cloth so they won’t show in the final product.
To wrap up your jack-o’-lantern, place a tea light or small candle inside through an open lid at top – voila! You’ve created perfectly carved pumpkins ready for display on Halloween night! Remember practice makes perfect; each year you’ll get better at carving unique designs into these festive fruits.
Tips on Maintaining Your Pumpkin’s Freshness After Carving
Carving a pumpkin is fun, but keeping it fresh after can be tricky. Here’s some expert advice to help you out.
- Choosing the right pumpkin is the first step. It should be firm and free from cuts or bruises. When carving, remove all the seeds and pulp inside as these cause rotting faster.
- After carving your masterpiece, use bleach! Yes – household bleach helps kill bacteria that makes pumpkins rot quickly. Mix one tablespoon of bleach per quart of water and spray this solution on both the inside and cut areas of your pumpkin daily.
- Another tip is to rub petroleum jelly or vegetable oil on the carved parts which keeps them moist longer preventing shriveling up too soon!
- If possible, keep your carved pumpkin in a cool place during daytime hours when not displaying at night because heat speeds up the decay process.
- If you see mold starting to grow don’t worry! Simply wipe off with vinegar; it kills mold spores instantly helping prolong freshness!
Remember these tips for maintaining your carved Halloween Pumpkin’s freshness so everyone can enjoy its spooky charm for a longer time period!
Creative Ideas & Inspirations for Pumpkin Designs
Discover unique pumpkin carving techniques, innovative design themes and gain inspiration from professional pumpkin artists to elevate your Halloween décor.
Exploring Unique Pumpkin Carving Techniques
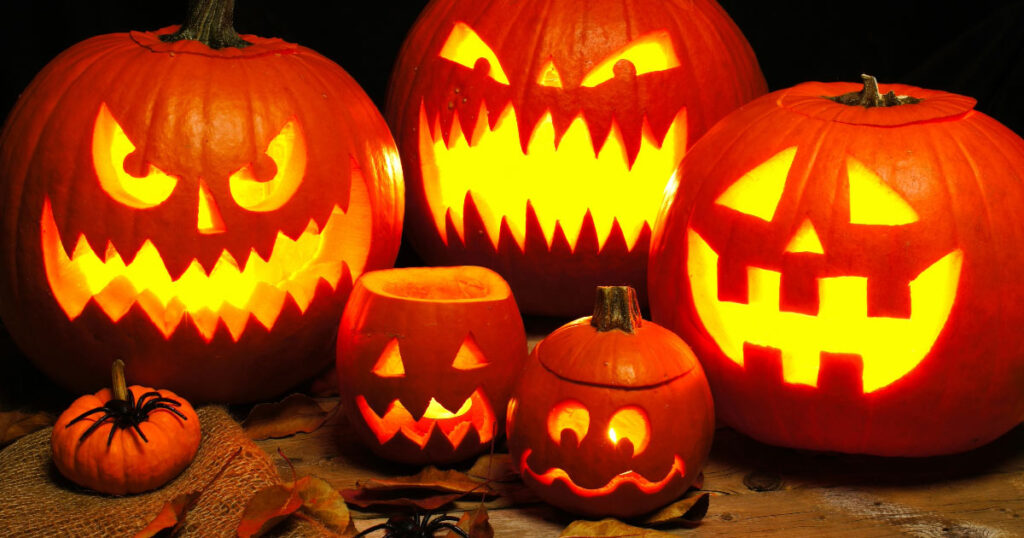
Pumpkin carving is a fun and creative way to celebrate the fall season, especially around Halloween. Traditional pumpkin carving involves cutting out simple shapes like eyes, nose, and mouth to make a jack-o-lantern face. But did you know there are unique techniques that can take your pumpkin masterpiece to the next level?
One technique is etching or skinning where instead of cutting all the way through the pumpkin’s flesh, you just scrape off its outer layer. This creates an amazing effect when it’s lit from inside because light shines more softly.
Another method is sculpting which turns pumpkins into three-dimensional works of art! With this approach, tools such as clay loops or linoleum cutters are used for detailed work on features like facial expressions.
A new trend in pumpkin design uses drill holes for creating intricate patterns across whole pumpkins – even 360-degree designs!
Innovative Themes & Concepts for Pumpkin Designs
Fall is here and Halloween is just around the corner! It’s time to start thinking about your pumpkin design. But this year, why not try something new? There are so many innovative themes and concepts you can use.
One cool idea could be a galaxy theme. You can paint your pumpkin black or dark blue, then add stars with white or silver paint. Another unique concept might be an emoji-themed pumpkin! Just carve out your favorite facial expression for some modern fun.
Or maybe you love animals? A cat-face carved into a small round pumpkin would look adorable on any doorstep. If carving isn’t really your thing, no worries! Try using markers or paints instead to create cute animal faces right onto the pumpkins!
For those who like spooky stuff, how about creating haunted house silhouettes on larger pumpkins? Or making creepy crawly spiders by adding eight pipe cleaner legs?
The possibilities are endless when it comes to designing pumpkins in creative ways. So go ahead – get imaginative and make this Halloween one-of-a-kind with these fresh ideas for pumpkin designs!
Inspiration from Professional Pumpkin Artists
Pumpkin carving is a fun activity that many people enjoy during the fall season, especially around Halloween. But did you know there are professional pumpkin artists who take this tradition to a whole new level? These talented individuals can transform ordinary pumpkins into amazing works of art.
Professional pumpkin artists use various tools like knives, chisels and even power drills to create their masterpieces. They carve out intricate designs ranging from scary faces for Halloween to detailed portraits of famous figures or beautiful scenes from nature. Some might spend hours or even days working on one single pumpkin!
Seeing these fantastic creations can be really inspiring! It shows us how creativity and patience can turn something simple like a pumpkin into an impressive piece of art. So next time when you’re carving your own pumpkins at home, remember it’s not just about making jack-o-lanterns with funny faces but also expressing your artistic side too! You never know what masterpiece could emerge if we put our heart and soul into it.
Mastering the Art of Pumpkin Carving Key Takeaways
To sum up, pumpkin carving is a fun and creative activity that you can enjoy during the fall season. It’s important to have the right tools like special saws for cutting, scoopers for cleaning out seeds and markers for drawing designs on your pumpkin. Lighting options such as small LED lights or tea candles also enhance your carved masterpiece.
Choosing the perfect pumpkin involves considering its size, skin texture without bruises or cuts, uniform coloration without green patches and firmness indicating it’s full of flesh inside – great for carving!
The process of carving needs patience but doesn’t require perfection – just draw simple designs if you’re starting out then carefully cut them with sharp knives (with adult supervision). Place a candle inside through an opening at top to give our carved friend some spooky glow in the dark!
Remember safety first while using these tools because they’re still sharp enough to cause injuries if not used properly. Also maintain freshness by removing all seeds/pulp from inside after carving; use bleach solution daily on both insides/cut areas; apply petroleum jelly/oil on carved parts preventing shriveling too soon; keep it cool when not displaying at night since heat speeds decay.
Get imaginative this Halloween – try unique techniques like etching/skinning/sculpting/drilling holes across pumpkins creating intricate patterns/designs or even 3D works of art! Always remember: no matter how fancy your technique gets – safety comes first so always have an adult supervise while using sharp tools.


